Deskripsi
Setting can be completed in few minutes. Tooling run-out accucary maintain in 0.002mm. With high strength and long tool life properties, product quality is ensured and cost per component is reduced, too.
Features:
- High balance of 15,000min-1 / G6.3 class
- Best in long overhang diamond tools
Application:
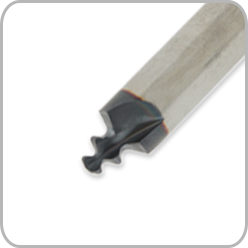
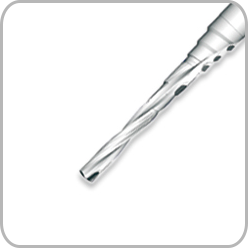
- Essential to ensure the best performance of high-precision high-performance reamers and drills
- Available in various editions for all current types of spindle
Extreme accuracy in a matter of minutes
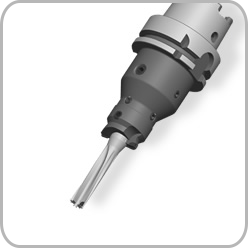
The UM DANDIA™ Adjustable Toolholder is a unique solution ensuring extreme accuracy and high clamping force balanced to 15,000 rpm/G 6,3. The holder provides an effective user-friendly method of setting up the tools.
OUT-OF-THE-BOX SOLUTION
The UM DANDIA™ Adjustable Toolholder is an indispensable part of our tooling concept, which many of our customers refer to as ‘out-of-the-box-performance’. In short, this means that when the machine spindles are in good
order, the toolholder assembly can be taken right out of the box and placed on the machine spindle, and the first part produced will be a good part.
KYOCERA UNIMERCO supplies the tool holder assembly pre-balanced, gauge length preset and with assembly set run-out within 0.002mm.
Performance and precisions
Two levels of radial and axial adjustment
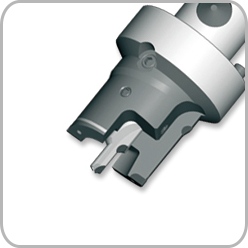
The possibility to adjust the radial concentricity in two levels is especially important when using long cutting tools with more than one step. The toolholder allows for the tool to be adjusted in pre-setting equipment or even mounted at the spindle to ensure an extremely narrow part tolerance. Analyses have shown that once adjusted to a specific spindle, it has a very high repetitive accuracy after tool change.
Choosing the right solution
The right choice of toolholder primarily depends on the machining process. The various operations place very different demands on the toolholder which emphasises the importance of choosing the right toolholder according to the individual machining situation. Naturally, we will assist you in choosing the optimum tooling solution for any task, based on an analysis of machine, cutting tools, application material and type of operation.
Customer advantages
The user-friendly adjustable holder requires a minimum of handling and provides a stable high-precision solution especially suited for long PCD tools placing heavy demands on the toolholding solution. It can be set within a matter of minutes, maintaining 0.002mm or better runout. In the long term, this will improve tool life and robustness, resulting in consistent part quality and reduced cost per part.
Instructions
Only measure directly on the PCD if using a dial indicator with low pressure or mounted with a ruby ball tip.
Placement of dial indicator.
Fixing and straightening of tools
- Draw screws A and B down until they touch the shank flats of the tool. Flats on shank of tool are to be in line with these two screws.
- Draw down the remaining set screws (C,D,E,F,G,H) until they all touch the shank of the tool.
- Place the indicator tip on point Z, using set screws C, D, E, F. Adjust the runout of the tool at this point.
Balance runout by adjusting set screws 180° apart, example C opposite E, then D opposite F. Note that a minimal torque as per figure 4 should be used on these set screws. For best results, a maximal TIR of 0.004 mm should be maintained.
- Place the indicator tip on the end of the tool as indicated in figures 1 and 2, using
set screws A, B, G, H. Adjust the runout of the tool at this point.
Balance runout by adjusting set screws 180° apart, example A opposite B, then G opposite H. Note that a minimal torque as per figure 4 should be used on these set screws. For best results, a maximal TIR of 0.004 mm should be maintained.
KYOCERA UNIMERCO recommends that the above adjustment is made while the tool holder is mounted in
the machine spindle. If pre-set equipment is used, the TIR between the pre-set equipment and the machine
spindle must be taken into account.


